What is M-Squared, you ask?
Basically, it’s a measure of how well your laser beam focuses, or more accurately, how close it is to a perfect Gaussian beam. You can read more about what M2 is and where it comes from over here.

Diagram of M-Squared Parameters
Assuming you are already familiar with M2, you may also be familiar with some of the challenges that come along with trying to measure it. These can sometimes include a tricky setup and slow measurement process.
Before we try to find an easy solution, we should probably nail down why M2 measurement typically has these issues.
Finicky Setup
One must measure the laser beam width at multiple points along the beam path (or caustic) to get an accurate M2 value for the laser. ISO only requires a minimum of ten measurement points, but generally, the more points that are measured, the better the result will be. (Also, it’s easier to spot outliers when there are many “inliers.”)
")
Graph of Beam Width as a Function of Position (for M-Squared calculation)
A compact M2 measurement system might “fold the beam” by using motorized deflecting mirrors to check the laser at different points along the caustic, so this means that the laser must be positioned and angled just right at the entrance of the instrument. If it is somewhat at an angle or off-center, the beam might deviate off the sensor while traversing the caustic. Furthermore, it’s not so easy to see what’s going on when the measurement system is enclosed within a housing.
Slow Measurement
The relatively long time needed to measure M2 also stems from the fact that the beam width must be measured at various intervals. Not only does this mean the mirrors or the detector must be moved in between each measurement, but it also means the power and energy density is constantly changing.
As the detector moves in and out of focus, the power density gets higher and lower. We must change the attenuating filters in between each measurement to be sure the camera isn’t saturated. This can be done automatically, but it still takes time.
A Simpler Approach

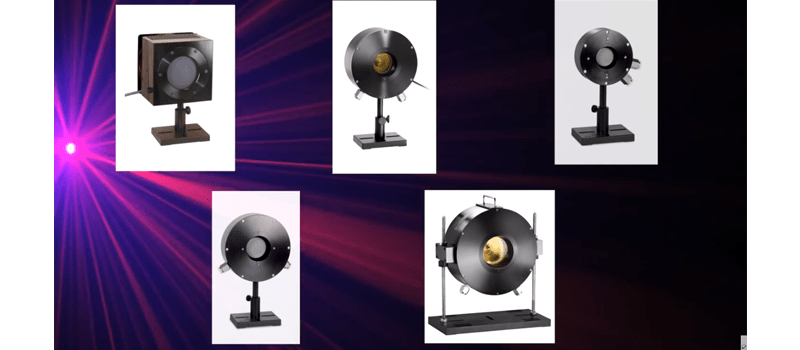
NanoModeScan
What if we just have the detector move along a rail and measure at different intervals? Since there’s no need for mirrors, the setup shouldn’t be as complicated. NanoModeScan is an example of an M2 detector measurement using this method. Since this system is completely linear, you just need to check that the beam is in the NanoScan head’s aperture twice: once at each end of the rail.
In addition to the lack of mirrors, NanoModeScan can be completely open so it’s much easier to check exactly where the laser beam is aimed. (Although it also comes with an optional cover, in case safety is an issue.)
Scanning-Slit Benefits

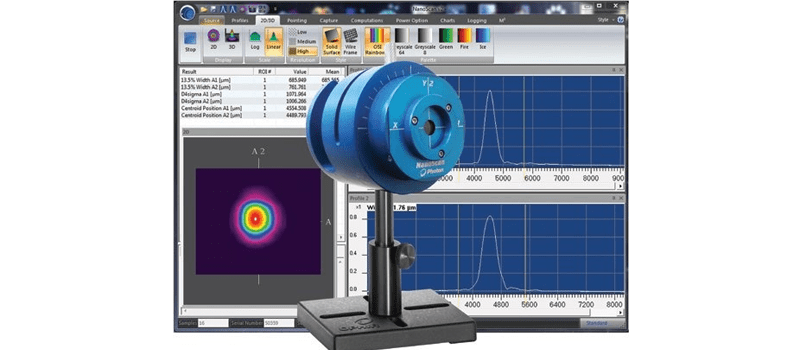
NanoScan
On top of this, we get all the benefits that come with using a scanning slit beam profiler such as NanoScan. In this case, there are two main strengths that NanoScan lends to the situation:
1) Very high dynamic range: Because of the naturally high dynamic range that scanning slits have, we don’t need to worry about changing the filters between measurements. This means we can get the M2 value much faster.
2) Depending on the detector in the scanning slit head, pretty much any wavelength between deep UV and far IR can be measured.
You might also like to read:


Leave a Reply
Your email address will not be published. Required fields are marked *