Ensuring product quality and reproducibility of 3D printing / Selective Laser Melting (SLM) system operation is essential part of any additive manufacturing process.
Quality and reproducibility between one layer to another or different lasers on the same system and even between systems significantly depends on the laser beam parameters.
Laser Malfunctions & Degradation to Look for
Being the most important element of Additive Manufacturing system, the laser is most vulnerable to many malfunctions and degradation processes such as:
- Optical pass (lens) misalignment could cause total change of any beam parameter, especially beam symmetry and focal spot size.
- Fiber laser overheating due to intensive operation and insufficient chilling, causing wavelength fluctuation could result in focal shift.
- Thermal lensing, due to overheating of one of the many laser components and lenses of delivery system causing focal shift and spot size change.
- Optical pass contamination by powder – causing change of laser intensity and power density distribution.
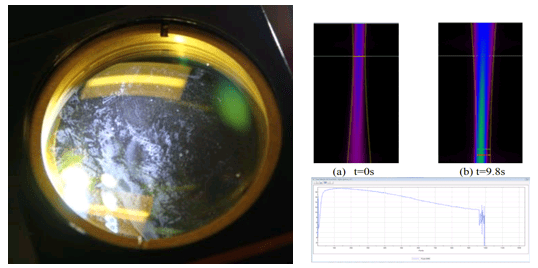
- Mechanical integrity error of laser actuator causing error in laser Z movement and thus focal shift.
- Reduction of diode charge or flashlamp intensity and sequential reduction of laser intensity.
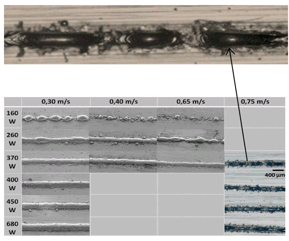
Any of these could cause significant degradation of systems performance, efficiency and lack of reproducibility.
In addition, specifically in Additive Manufacturing, powder-bed laser system, the product design requires the use of a variety of power levels. These different setting are a function of the structural integrity of the device under build, but also the efficiency of the design to avoid the use of excess materials, powders, and processing time.
In a typical 1KW Additive Manufacturing laser, power levels during the build can range from 400W to 1000W, for either short or long durations. Therefore, monitoring the laser beam at these different power levels is required. And since some of these builds can take many hours, finding out after the build that the laser is not round to specification is a costly result. These beam profiling diagnostics alerted the client to a potential problem BEFORE they went to build product, avoiding costly mistakes.
Monitoring Laser Parameters
Monitoring laser parameters, aka “Beam Profiling”, both periodical and occurrence related is essential for insuring quality of the process.
ISO 11146 : The main standard of laser quality measurements defines following parameters for laser quality assurance:
Focus position (z)
Power/ Power density (W/cm²)
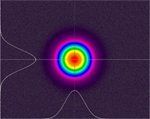
Beam Profile (x, y) – ellipticity / roundness
Spot size / shape
Generally, there are 2 methods of Beam profiling –
Generally, there are 2 methods of Beam profiling – camera based (by using many attenuations) or scanning pinhole measurement
1. Direct, camera based, by using many attenuations or scanning pinhole measurement.
These beam profiling techniques while operating in high power laser industrial environment, have limitations such as :
- Beam distortion due to multiple optical surfaces required for attenuation
- Cannot correctly detect focal shift
- Limited laser power and subject to wear and laser damage
- Caustic measurement requires a z translation which takes time
2. Non-contact Rayleigh Scattering measurement, as performed in Ophir BeamWatch and BeamWatch AM used for 3D printing and Additive Manufacturing, that performs measurement without interaction with the beam by measuring light scattered by interaction of focused laser and air .
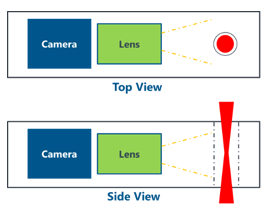
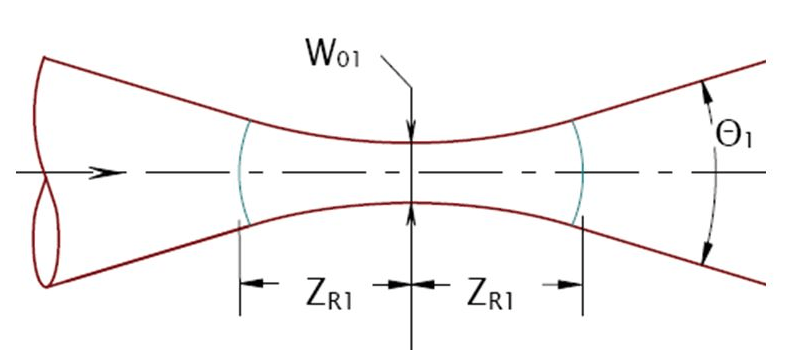
This allowed measuring entire Caustic in one frame, thus providing a real time M2 and focal shift and size measurement without power limitation
All laser parameters are monitored in live and enable preventively adapt the laser parameters to compensate their evolution and trending the focus shift as preventive maintenance.
Summary:
In order to improve quality of SLM systems and increase efficiency and maximize machine and resource utilization, maintaining proper laser parameters is essential.
- Non-contact measuring of the laser beam makes it possible to obtain more data in less time, including previously unmeasurable parameters, such as fast changing parameters over time or at varying power levels.
- Being user-proof and immune to wear improves reliability and integrity of the data.
- Fast setup and measurements allow more frequent laser parameter checks and improve productivity of system manufacturer and user.
On our next week blog post – We’ll provide you some interesting SLM systems troubleshooting examples! Stay tuned!





Leave a Reply
Your email address will not be published. Required fields are marked *