Don’t you wish there was a one size fits all beam profiler?
I know I do.
Problem is that the very thing that makes a beam profiler so perfect for one laser renders it useless for a different laser.
At risk of overcomplicating matters, we like to provide our customers with maximum flexibility. So, you can get one laser beam profiler and use it with many different kinds of laser beams – you’ll just need the proper accessories to use with each laser.
There are two main issues that will come up: laser intensity and beam size. (Wavelength is of course important too, but that has more to do with the type of imaging technique you’ll need than the attenuation or other accessories.)
Beam Intensity
CCDs are extremely sensitive which means unless you have a very, very low power laser, you’ll need to lower the laser power before it reaches the camera.
The first lines of defense are your ND filters. These can attenuate anywhere between half and 99.99% of your laser’s intensity. Since these filters are nearly always used, you get three along with your CCD beam profiler.
For many lasers, this may be all you need.
But for high power and energy lasers this might not be enough.
(The ND filter itself has a damage threshold, not just the CCD, so you have to check the laser intensity both before and after the filter.)
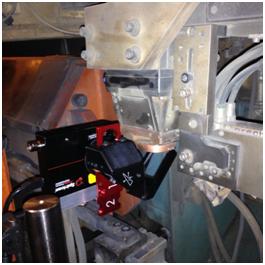
If you need further attenuation, you can use beam splitters in addition to the ND filters. One beam splitter can divert between 0.5% and 5% of the laser towards your beam profiler. (The rest of the beam passes through the splitter, to a beam dump, your target, or better yet, a laser power meter.) You can also use two or more beam splitters, which multiplies this effect.
Laser Beam Splitter and ND filters are used to profile this multi-kilowatt laser.
This takes care of your laser beam intensity.
What about the size of your laser?
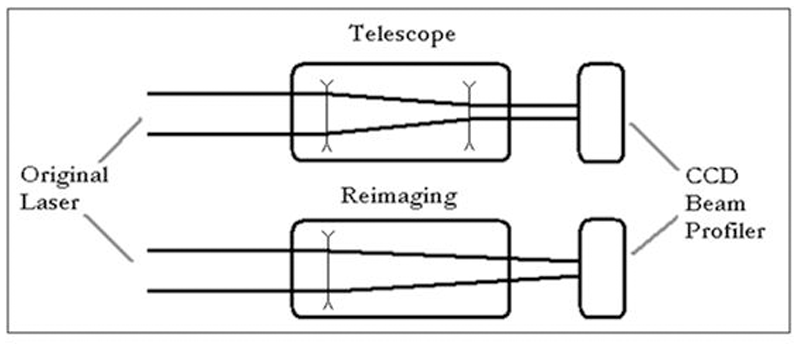
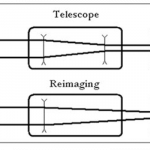
A CCD profiler, like any camera is made up of many pixels. If your laser beam is very small (less than 10 microns, for example), you will need to use a beam expander to improve resolution. (Added benefit: the beam hits the camera at a larger size, meaning the intensity of the laser hitting the CCD is lower than the laser’s actual intensity. Also, the more pixels that are illuminated on the imager, the better chance of an accurate measurement.)
Of course, if your laser beam is too large (greater than 5 – 30 mm, depending on the camera), it simply won’t fit in the camera’s aperture or imager. If you have this issue, you’ll need to use a laser beam reducer.
Take care when using a reducer that you consider the increase in intensity after the reducer (since a smaller beam has a higher power density).
Find out more about laser beam attenuation and optics:
- What Is an ND Filter? How You Should (and Shouldn’t) Use It
- Stacking ND Filters: The Right Way and the Wrong Way
- Beam Splitters for Serious Laser Power Attenuation [coming soon]
- Using a Laser Beam Expander – How and When?
- Laser Beam Too Big to Profile? Reduce It!
- Two Different Ways to Expand Your Laser Beam: Are You Using the Right Method?
- Laser Beam Profiler Attenuation: The Right Way and the Wrong Way
Leave a Reply
Your email address will not be published. Required fields are marked *